First posted: Dec 8, 2015
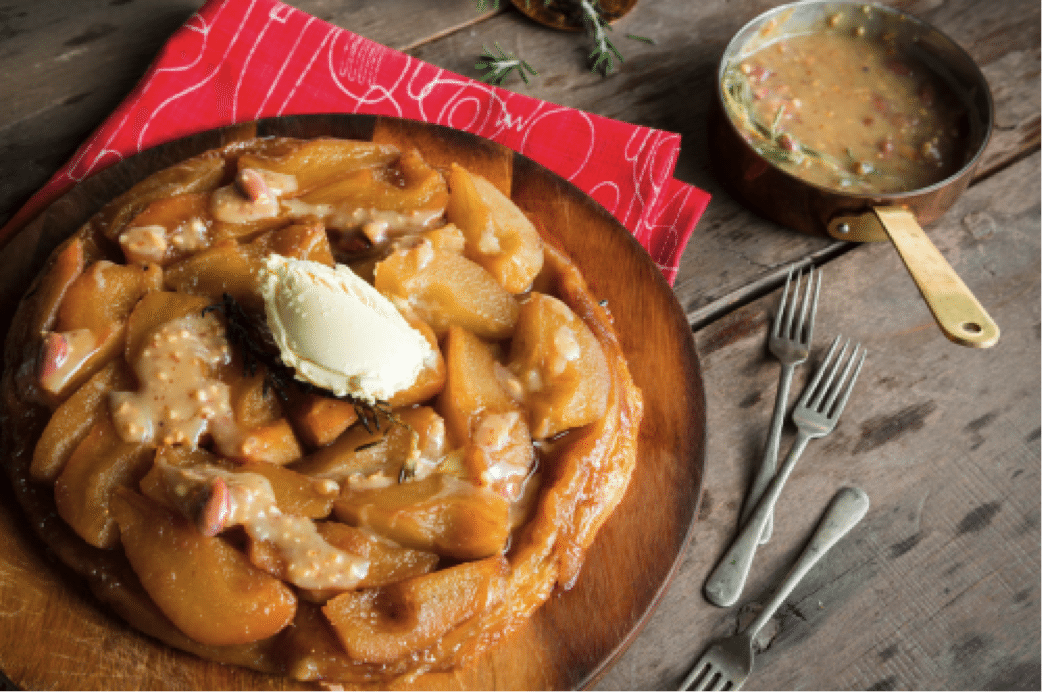
Pear and Rosemary Tarte Tatin with White Chocolate Ganache
Ingredients
Cooks in: Serves:4-6
- 75g light brown sugar
- 75g butter, cubed
- 6 pears, peeled, cored and quartered (enough to cover the base of your pan)
- 2 Tbsp water
- 1 Tbsp lemon juice
- 1 sprig fresh rosemary
- 1 tsp vanilla extract
- 400g readymade puff pastry, thawed
- 200g white chocolate, roughly chopped
- 100ml cream
- Mascarpone, to serve
What to do
1. Preheat the oven to 180 °C. 2. Place the sugar and butter in a heavy-based (ovenproof) frying pan over medium–high heat. Stir two or three times and then leave to simmer until the sugar is melted and golden. 4. Add the pears, lemon juice, rosemary and vanilla to the pan and gently stir until the pears are well coated. Cook gently for 5 minutes. Remove the pan from the heat and arrange the pears so that they are lying as flat and close together as possible. 5. Cut out a circle of pastry that is 2-3cm wider than the width of the pan. Lay it over the pears and tuck in the sides so that everything is well covered. (If you don’t have an ovenproof pan, just transfer the pear mixture to a greased, shallow, round ovenproof dish or flan dish at this stage.) 6. Pierce the pastry a few times with a knife to allow steam to escape during cooking and bake for 25–30 minutes or until the pastry is puffy and golden. 7. Meanwhile, to make the chocolate ganache, heat the chocolate and cream together over a double boiler until the chocolate has melted. Stir until silky. 8. Leave the tart to cool for a few minutes before turning out onto a plate. Hold the plate over the pan with a dish cloth and invert the pan – be very careful, as the extremely hot caramel can spill out. Serve with chocolate ganache and a dollop of mascarpone (or vanilla ice cream). Notes Photo from 'Sarah Graham's Food Safari' by Ricardo de Leça.
If you don’t have an ovenproof pan, follow the instructions as far as step 4 using a regular frying pan, and then transfer the ingredients to an ovenproof tart dish and continue on from there with step 5.
Share this recipe

Find other recipes
 Food Safari Season 1
 Sweet Treats
Tags:
Food Safari Episode 4ganachepearrosemarytarte tatinwhite chocolate
Comments